

Starting a small business can be an expensive investment and one of the first things that business owners skip is setting up a professional business email.
I’ve seen so many business cards using a free Gmail account as the main business email.
This is a big mistake because when customers see a Gmail account, it gives the impression that you’re not a professional business and you lack credibility.
Having a true business email address goes a long way towards proving you’re a credible and genuine business that a customer can trust with their money.
If you’re a business owner who is using Gmail and you’re ready to start using a professional business email, you might have to reprint your business cards but you don’t have to get rid of your Gmail account!
Using Gmail To Manage Your Business Email
Did you know that you can use Gmail to manage one or more business emails?
When I first starting my own freelance web design business, I didn’t have a domain or a business email. So, I set up a Gmail account.
I quickly learned that my potential customers needed so see I have a presence online.
So, I bought a domain (this one) and set up my business email.
But, I started running into a productivity problem.
The customers that already had my Gmail email would send me tasks, but my new customers would send tasks to my business email and I was having to check emails in multiple locations.
Then I discovered a nifty feature inside of my Gmail account that let me send and receive my business emails and manage everything in one location!
8 Steps To Setting Up Your Professional Business Email Inside Gmail
Before I share with you the 8 steps to start using your business email inside of your Gmail account, I want to clarify that this tutorial assumes you already have a business email address set up.
If you want to set up a free business email then follow my Zoho Mail tutorial, then come back to this post.
Pre-Setup Step
The first thing you need to do before getting into the Gmail settings is forward your business emails emails to your Gmail account.
Because there are so many hosting companies and different server configurations, I’m not going to be able to cover how to do that in the tutorial. You will need to contact your hosting company for assistance.
Once you’ve set up the email forwarding, its time to jump into Gmail.
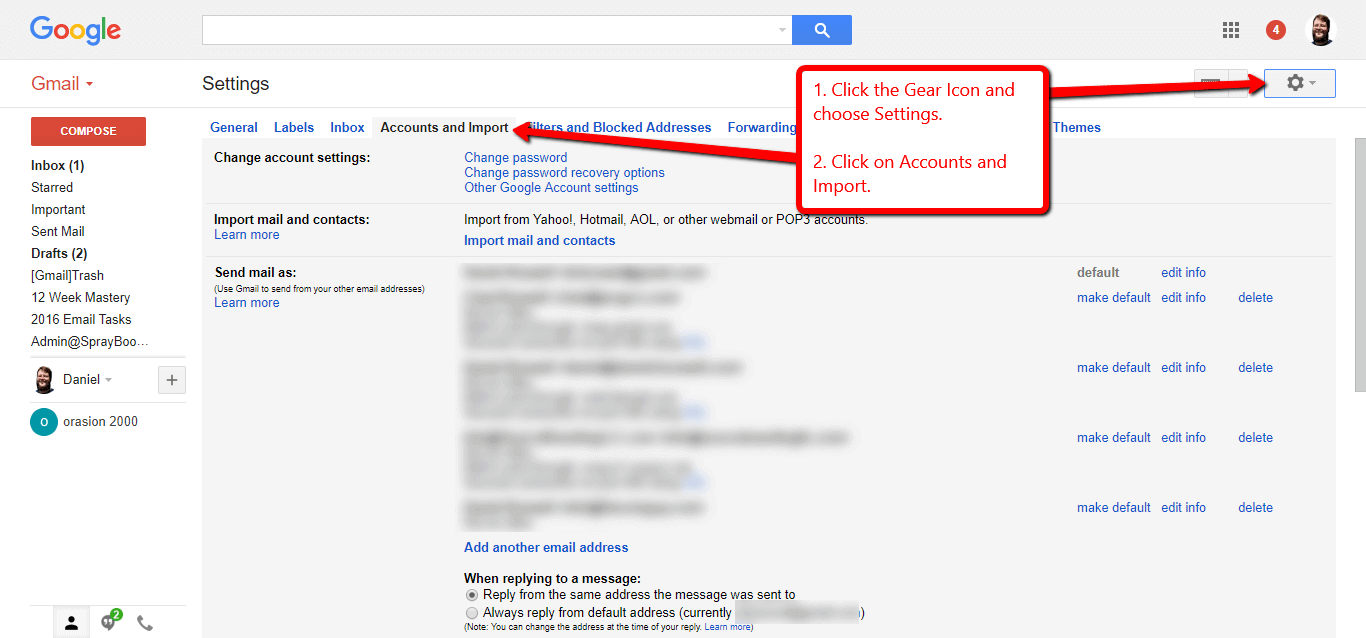
Step 1
Click the image for a larger view
- Click the Gear icon in the upper right corner of Gmail and choose Settings from the dropdown.
- Select the Accounts And Import Tab.
Step 2

Click the image for a larger view
- Scroll down to the “Send mail as” section.
- Click on the Add an email address link.
Step 3

Click the image for a larger view
- In the pop-up box that appears, enter your name and the email address you forwarded to Gmail.
- Then uncheck the “Treat as an alias” box.
- Click “Next Step”.
Step 4
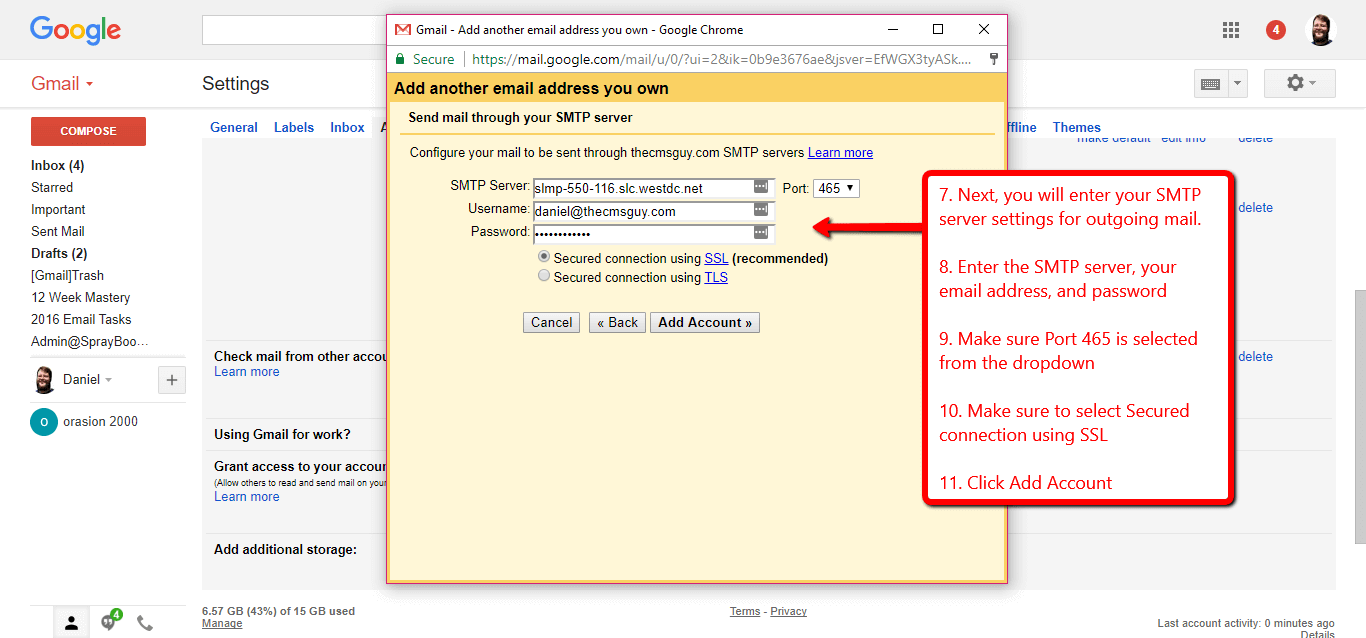
Click the image for a larger view
Next, we’re going to enter SMTP server settings for outgoing mail. You’ll need to get this from your hosting company.
- Enter the SMTP server, your email address and password.
- Select Port 465 is selected in the dropdown.
- Also make sure to select Secured connection using SSL.
- Click the “Add Account” button.
Step 5

Click the image for a larger view
- If all of the creditials are correct, you will see a screen asking to enter a confirmation code.
- Because you have already forwarded emails to your Gmail account, you should received the verification code email.
- Don’t close the pop-up, but just minimize it and go to your inbox to find the email.
Step 6

Click the image for a larger view
- You will receive an email similar to the screenshot above.
- Copy the confirmation number from the email.
Step 7
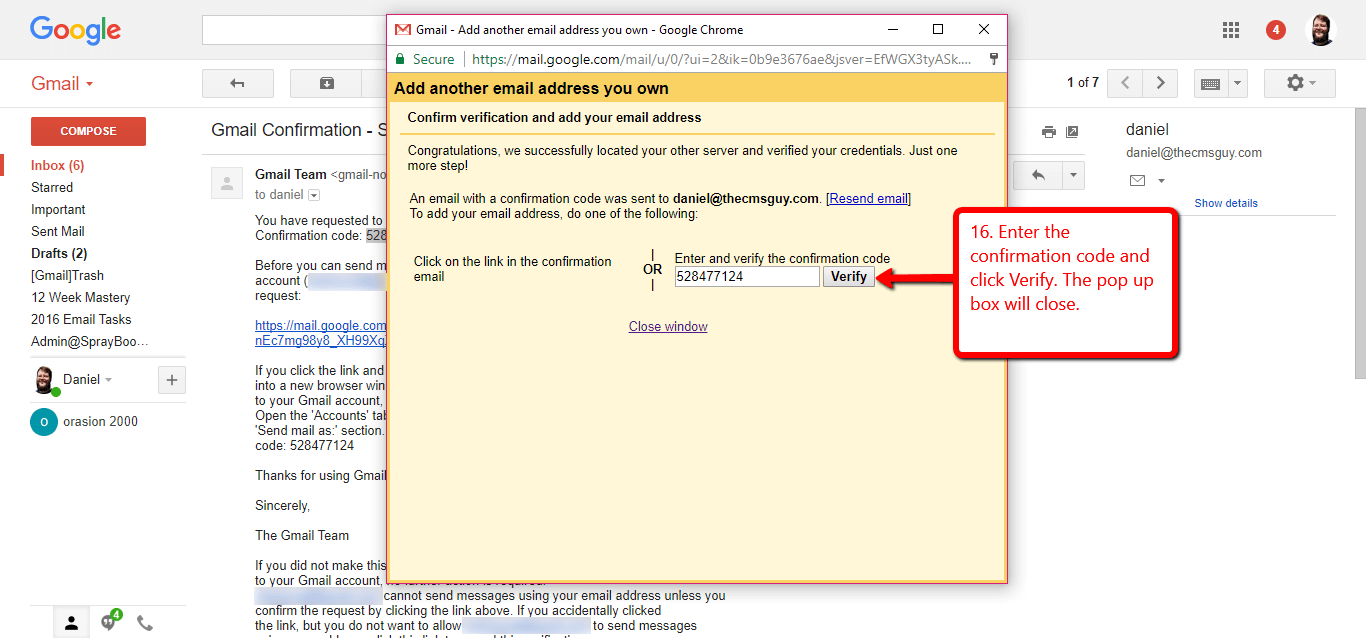
Click the image for a larger view
- Next, enter the confirmation code into the pop-up box and click Verify.
- The pop-up box will close.
Step 8
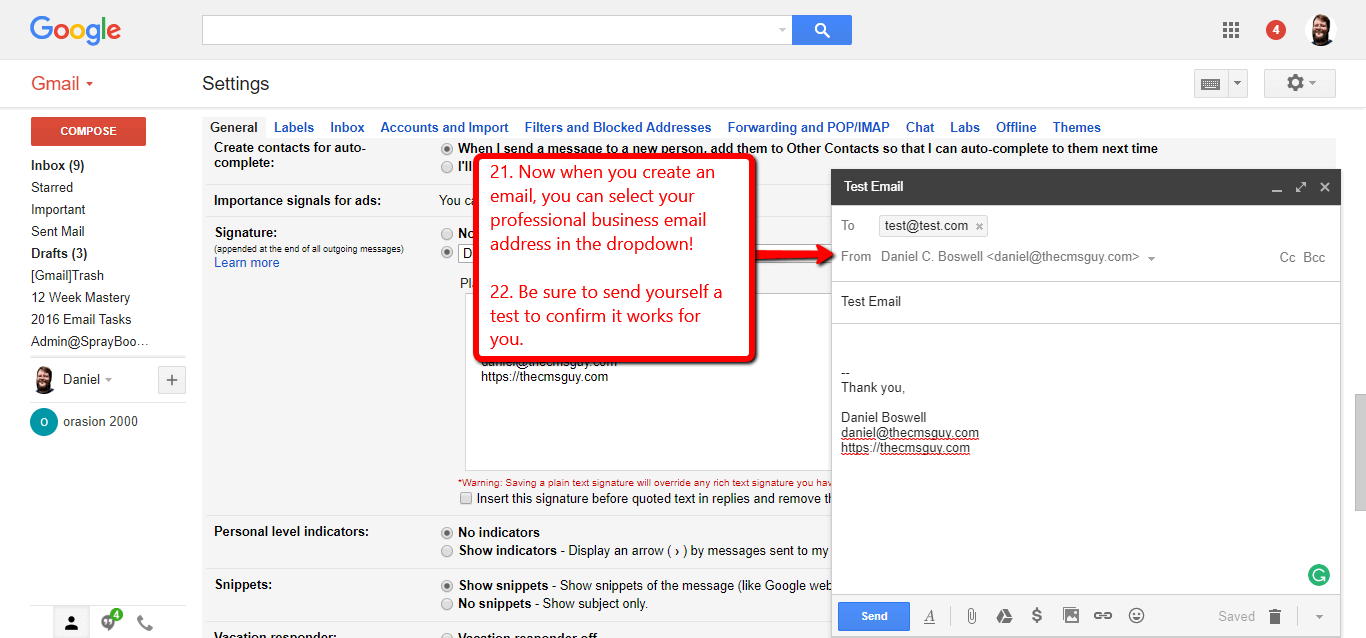
Click the image for a larger view
- Congratulations, you’ve set up your business email inside of Gmail!
- Now when you create an email, you can select your professional business email address in the dropdown in the From line.
- The final step is to send a test email to confirm everything is working.
Additional Gmail Settings
Now that you can send business emails from inside your Gmail account, there are a couple of other settings you can use to make things easier.
Add A Custom Email Signature
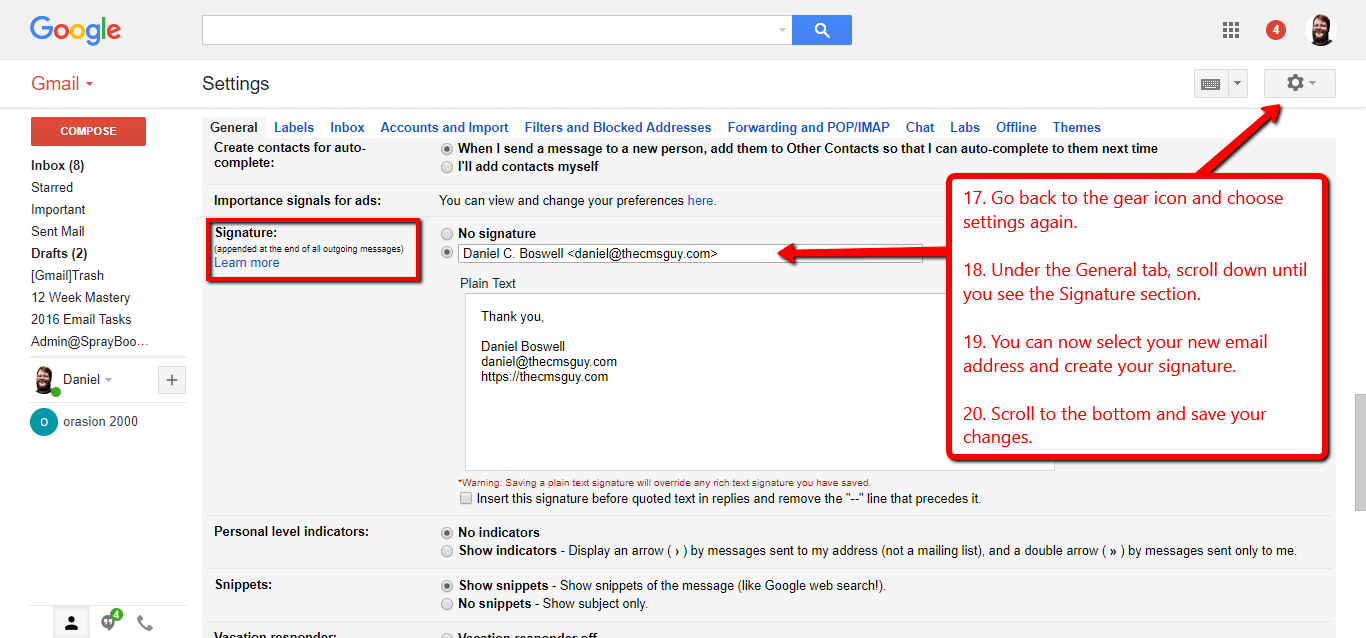
Click the image for a larger view
- Go back to the Gear icon and choose Settings again.
- Under the General tab, scroll down until you see the Signature section.
- You can now select your new business email address and create your signature.
- Scroll to the bottom and save you changes.
Automatically Reply As Your Business Email
Unfortunately, by default, you will reply as your primary email address. So, if someone sends an email to your business email address, you’ll want to follow the steps below to make sure you automatically reply with your business email.
- While in the Settings section, go back to the Accounts And Import Tab.
- Scroll back down to the “Send mail as” section.
- Under the “When replying to message” area, select the “Reply from the same address the message was sent to”.
- Scroll down and save your changes!
Wrapping It Up
After following this tutorial, you should be able to set up a professional business email and send and receive emails from within your Gmail account!
If you have comments or questions, leave them below and I will answer them for you!