
Think about this scenario for a second… if you saw a local restaurant on a Saturday night and it had 3 cars in the lot, would you want to stop by to try them out? Probably not. They might have great food, but if the parking lot is empty on the busiest night of the week, what does that say about how good that restaurant is?
In the same way, when someone picks up a business card and see something like “[email protected]”, it gives the impression that if “John” can’t invest in his business enough to at least have a website and an email address at that website, he might not be the best person to hire.
It also gives the perception that “John” doesn’t have an established business, just like an empty parking lot at a restaurant on Saturday night gives the perception that it must not be very good if they don’t have customers eating there.
The real issue is TRUST. A business email address adds a level of trust that a business is established.
So, If you’re in a similar situation to “John” , I have good news for you… there is an application called Zoho Mail that will allow you to set up free business email addresses for your website.
Why Use Zoho Mail?
There are a couple of options when considering a business email. Most hosting companies offer the option to create email accounts for your domain on the server. So you might be asking whats the problem with that?
Hosting company email servers aren’t reliable, and if your website goes down, that means your email goes down too. Also, you can’t always know that all of the emails you’re sending have been delivered.
With email being so crucial for businesses to operate, its imparative that email works consistently to avoid hurting the business.
So the other option is using a 3rd-party application. The most popular option for this is Google Apps for Work. I used this service in the past and it was great (and FREE), but back in 2012, Google decided to stop offering free accounts and now its $5 / month or $50 / year per user.
At that time, I was using Google Apps For Work to set up emails for churches, and with the free version removed, I had to find another service that was just as good but still free.
Thankfully, Zoho Mail came to the rescue!
The great thing about Zoho Mail is that you get a lot of great features with the free version including:
- Professional business email address on your own domain.
- Up to 25 user email addresses
- 5 Gigs of mailbox storage per user
- 5 Gigs of document storage per user
- Access to Zoho’s Office applications
Now that I’ve explained why I use Zoho Mail, let me show you how to get it set up for your business.
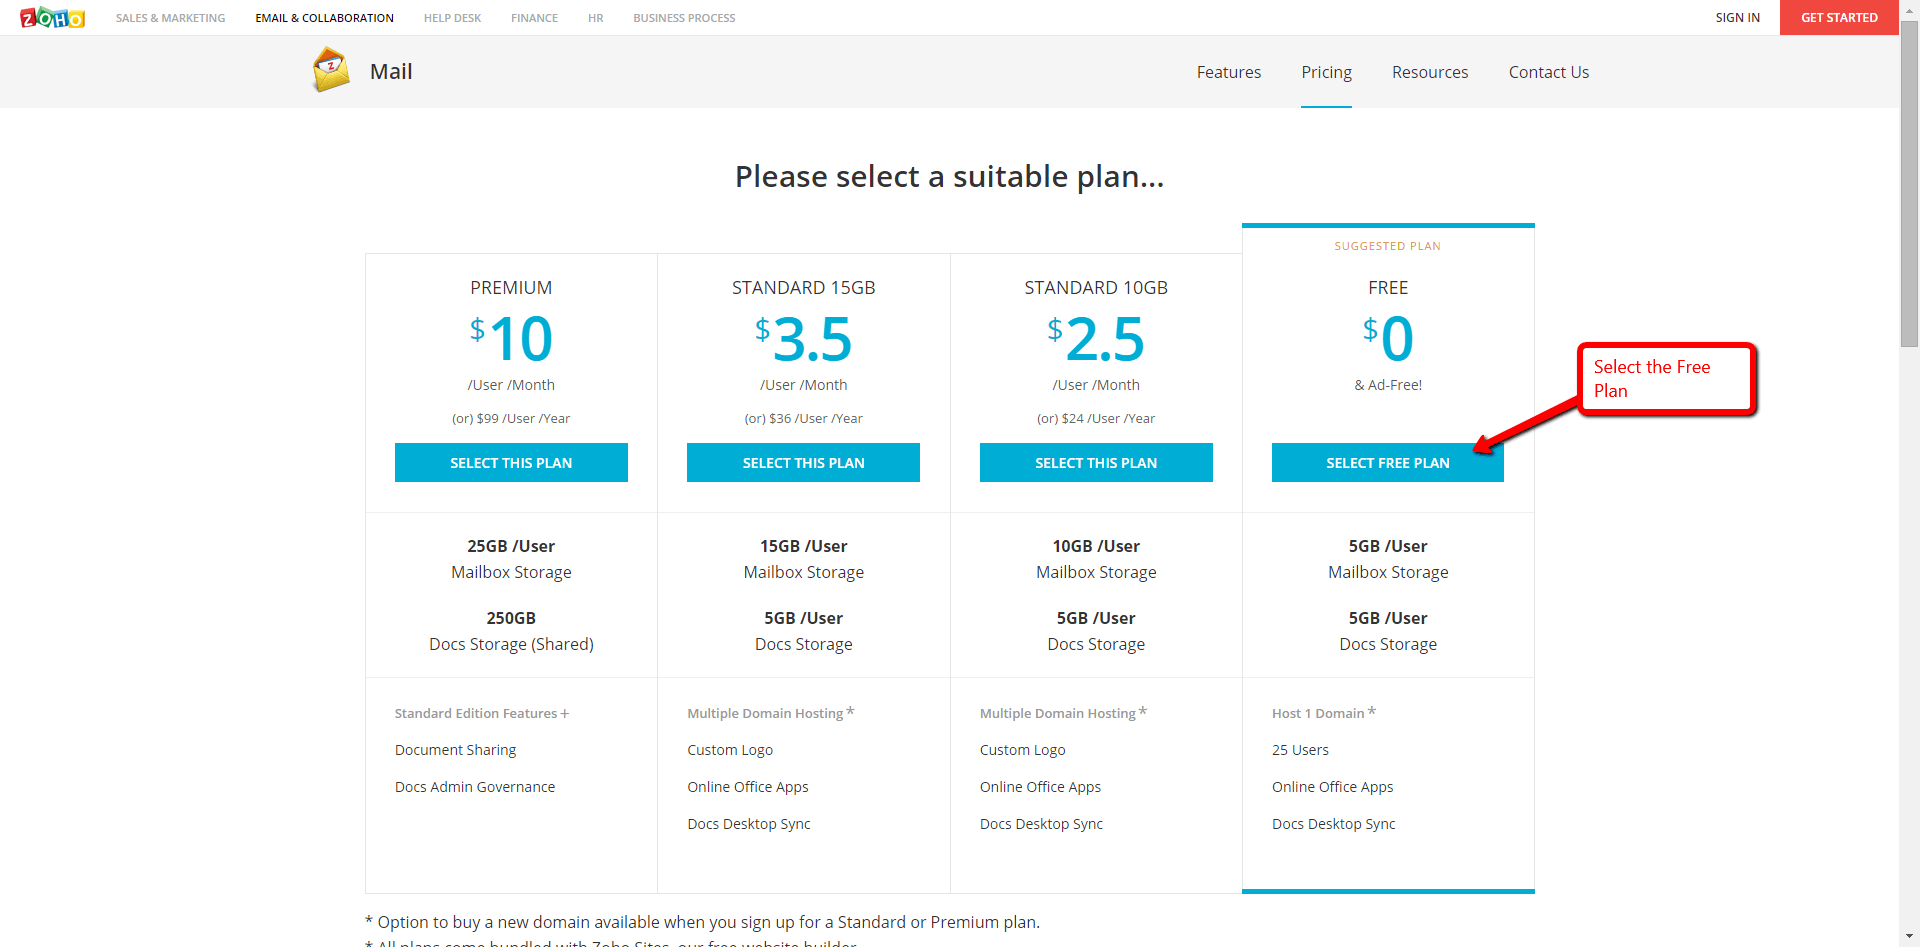
Step 1 Of 13: Select The Free Plan
For this tutorial, we will be using the free plan which includes 5 Gigabites of storage per user and allows up to 25 free user accounts. If you think you need more than that, feel free to select another plan.
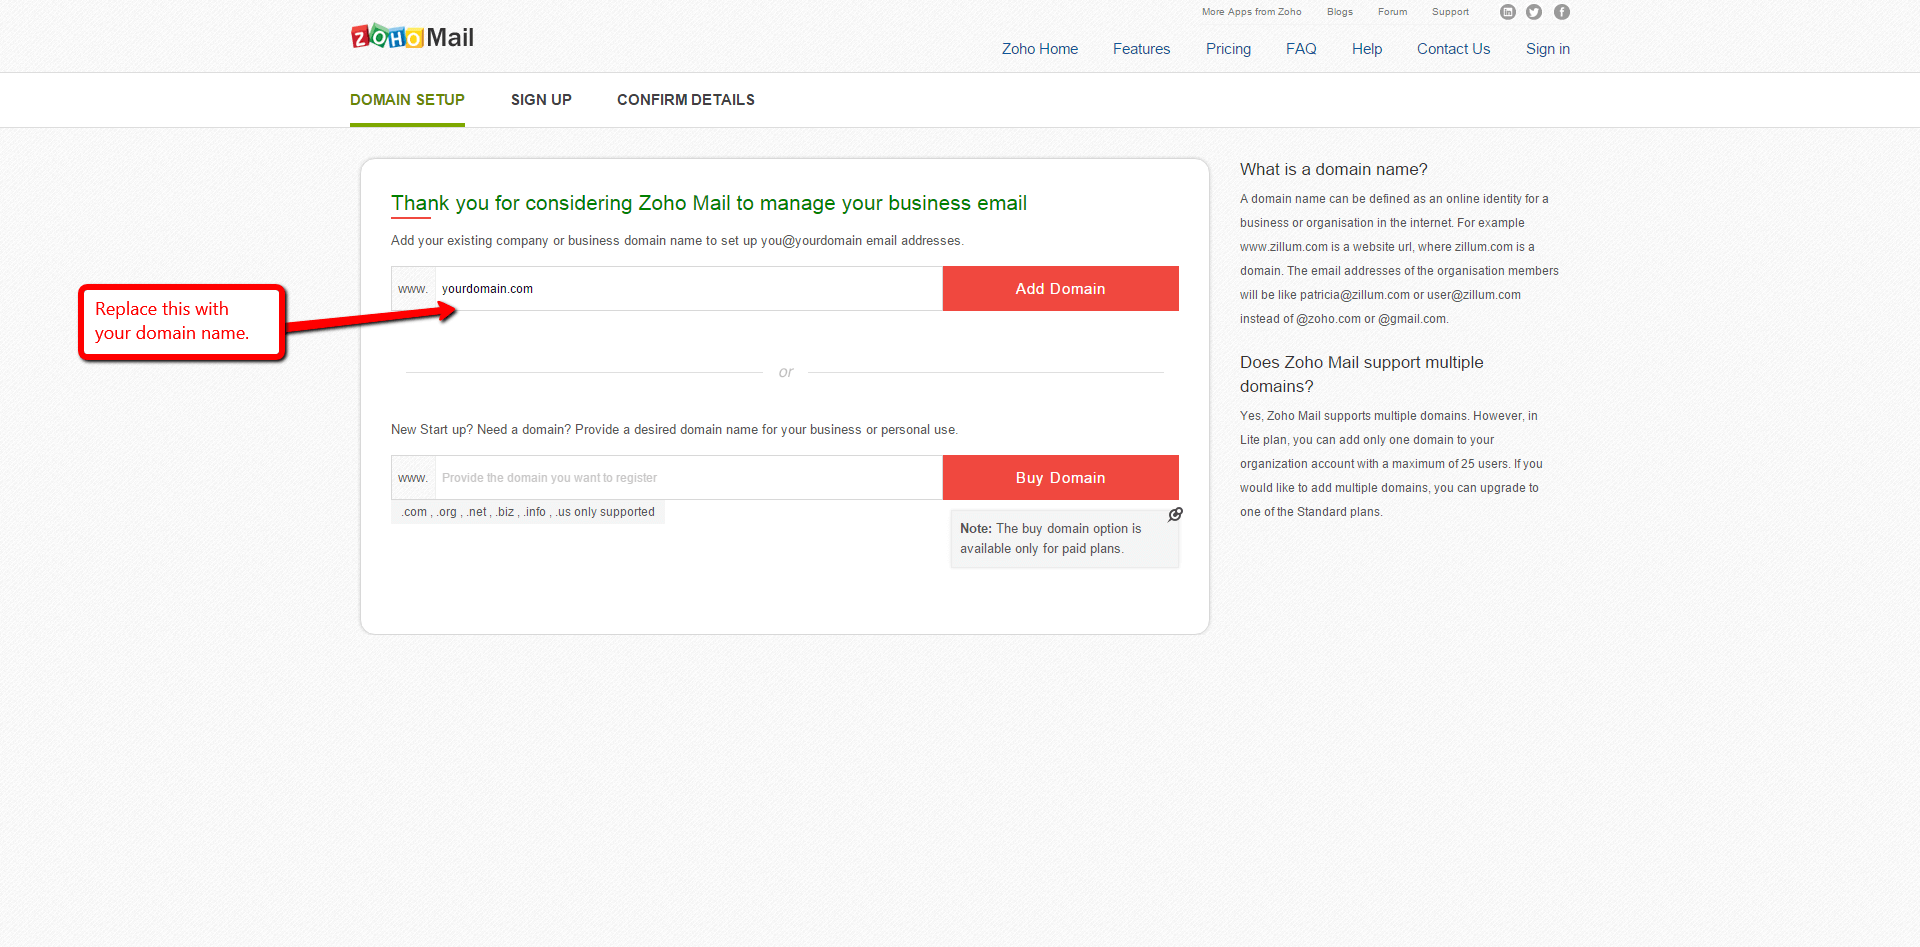
Step 2 Of 13: Enter Your Domain Name
I’m assuming you already have a domain name purchased, so enter it in the box on this step and click the Add Domain button.
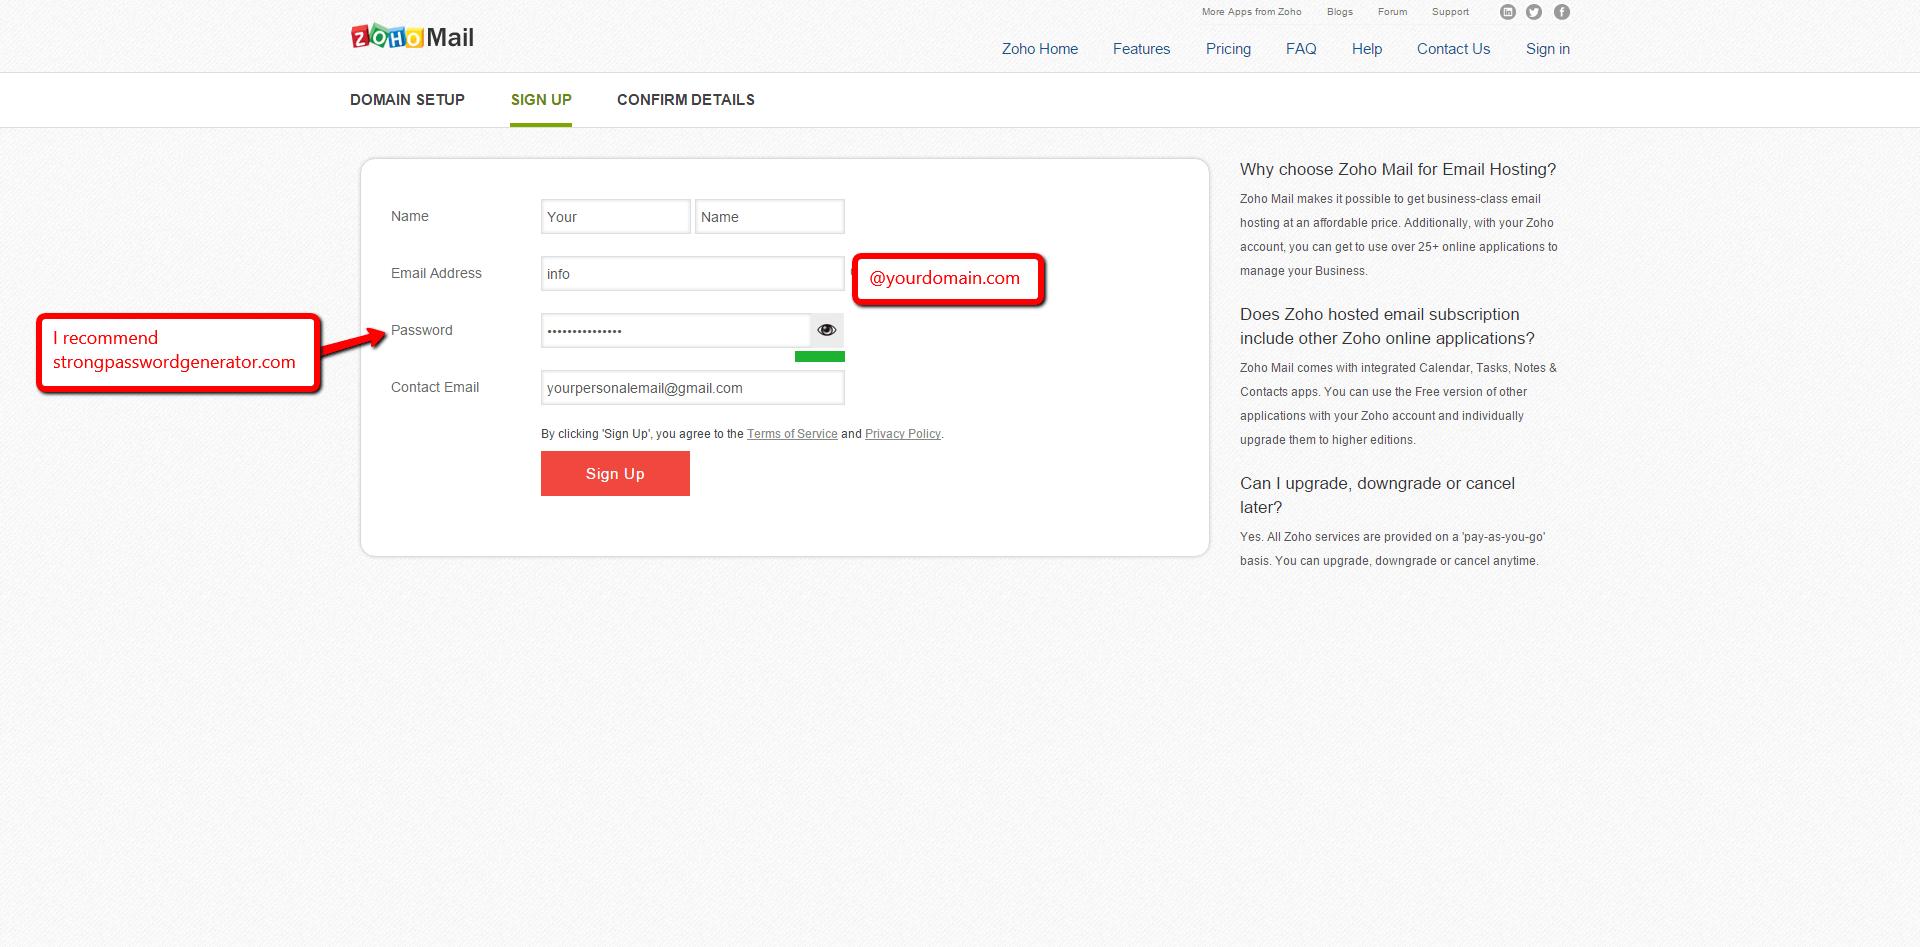
Step 3 Of 13: Create Your Account
Fill in the form to create your account. The email address field will needs to be the primary email you want for your business. The contact email should be a personal email you have full access to. This will act as a secondary account access email. I also recommend using StrongPasswordGenerator.com to create a secure password. When you’re done, click the Sign Up button to continue.
Don’t forget to write down the login information and store it in a safe place for future reference.
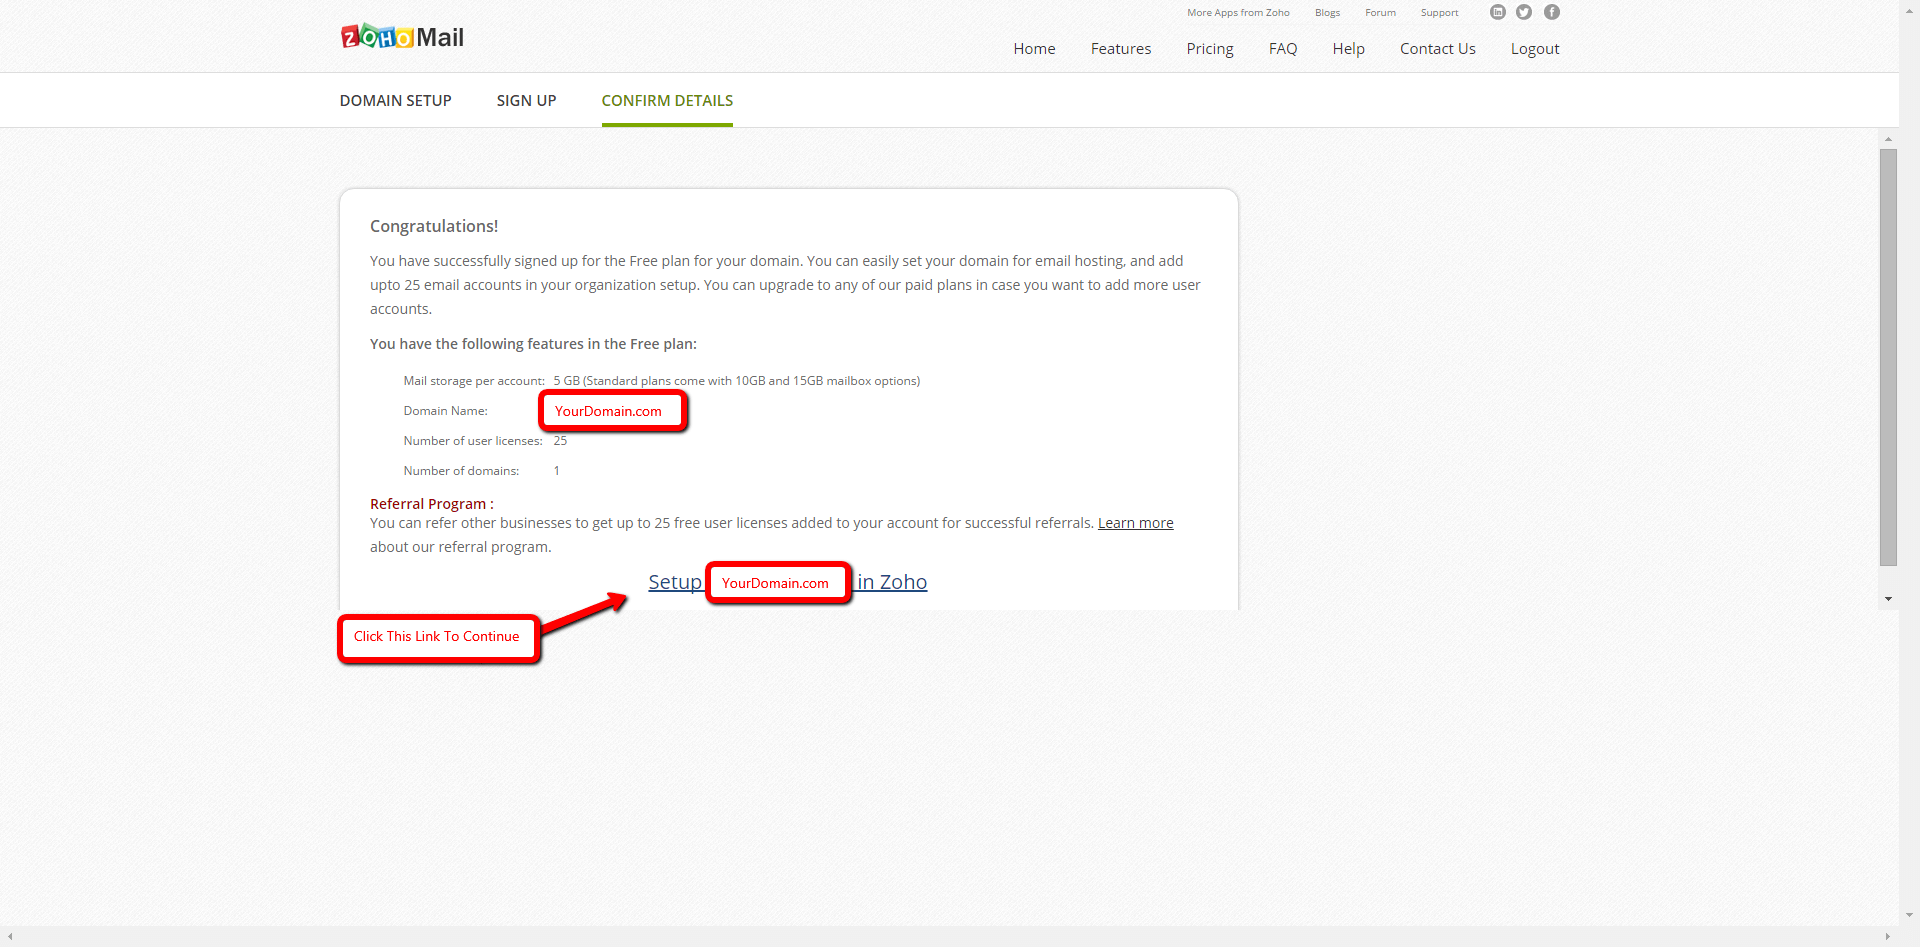
Step 4 Of 13: Setup Your Domain in Zoho
You will see a congratulations message with details about your free account for the domain you entered. At the bottom of the page is a link that will say Setup (Your Domain) in Zoho. Click that to move to the next step.
Step 5 Of 13: Verify Your Domain
There are 3 available methods for verifying your domain: CNAME, TXT, and HTML methods. This tutorial will focus on using the CNAME method, which is the best way of the 3 methods.
For the CNAME method, we will be adding the DNS record that is displayed on the page. Depending on whether you have a separate hosting account and registar account or if they are all under the same company will determine a lot of how you go about adding the record.
Zoho Mail has a dropdown list of hosting providers that give specific instructions on how to add the record. If you see your hosting provider listed, then select it and follow those instructions.
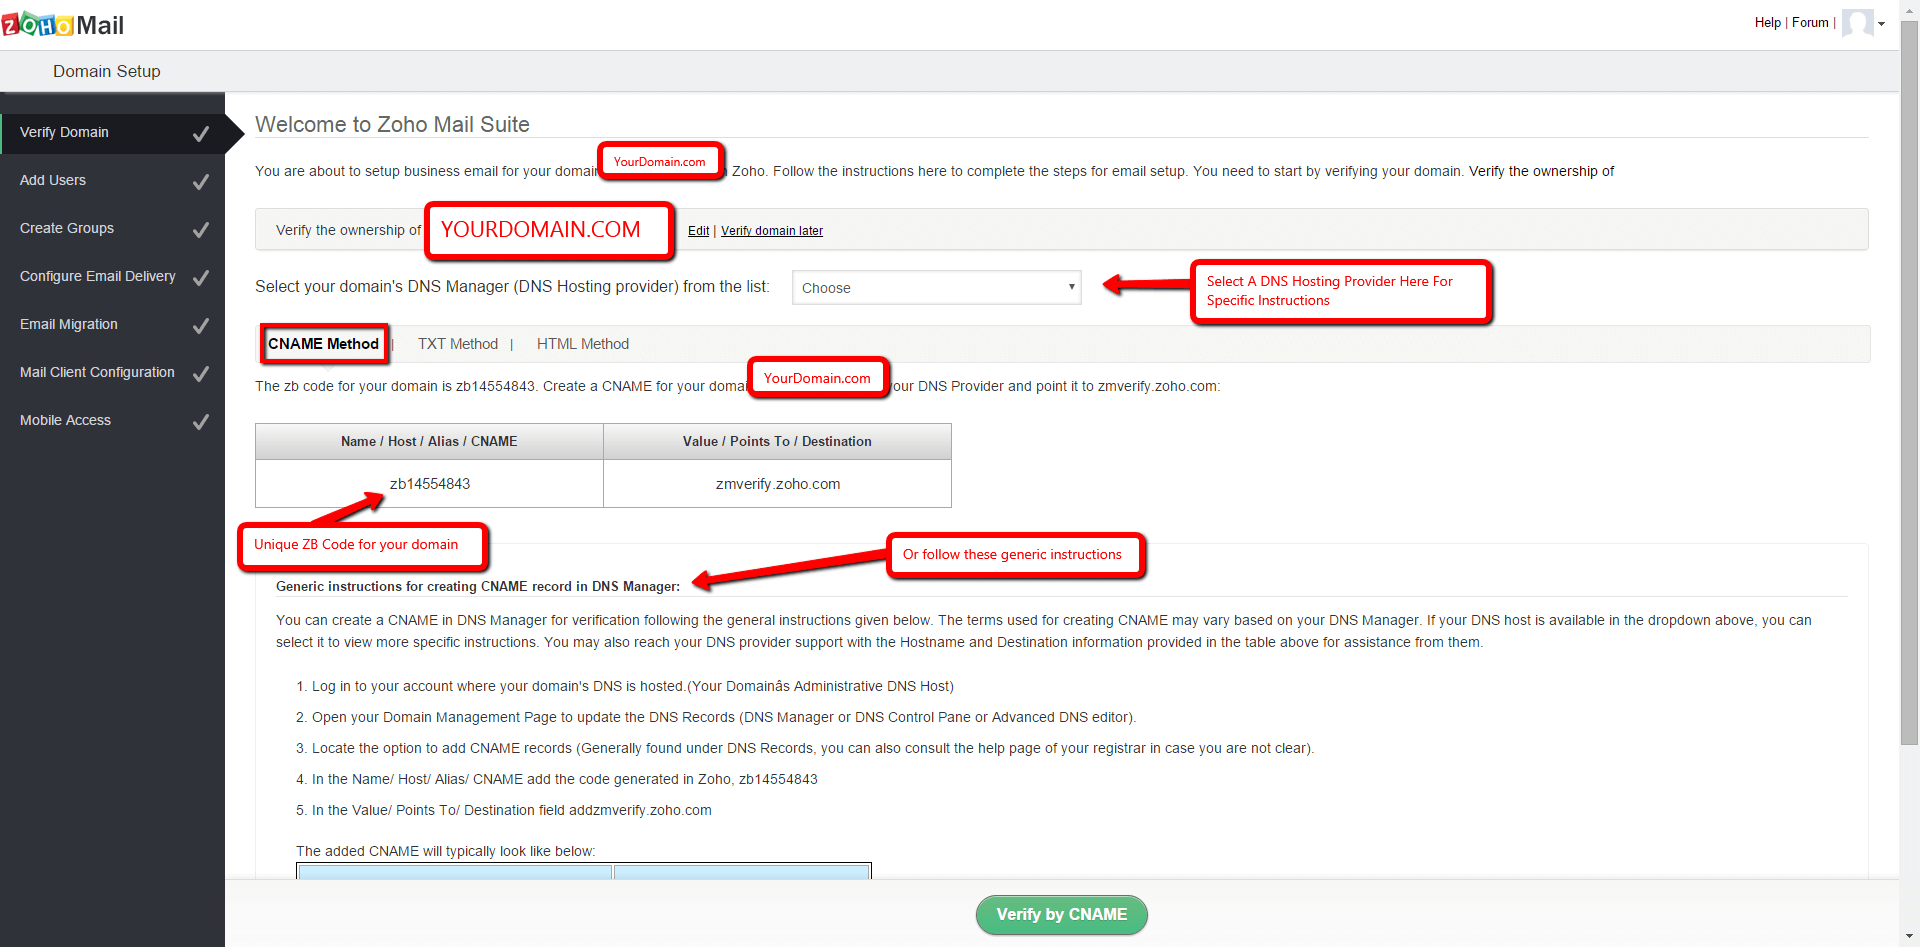
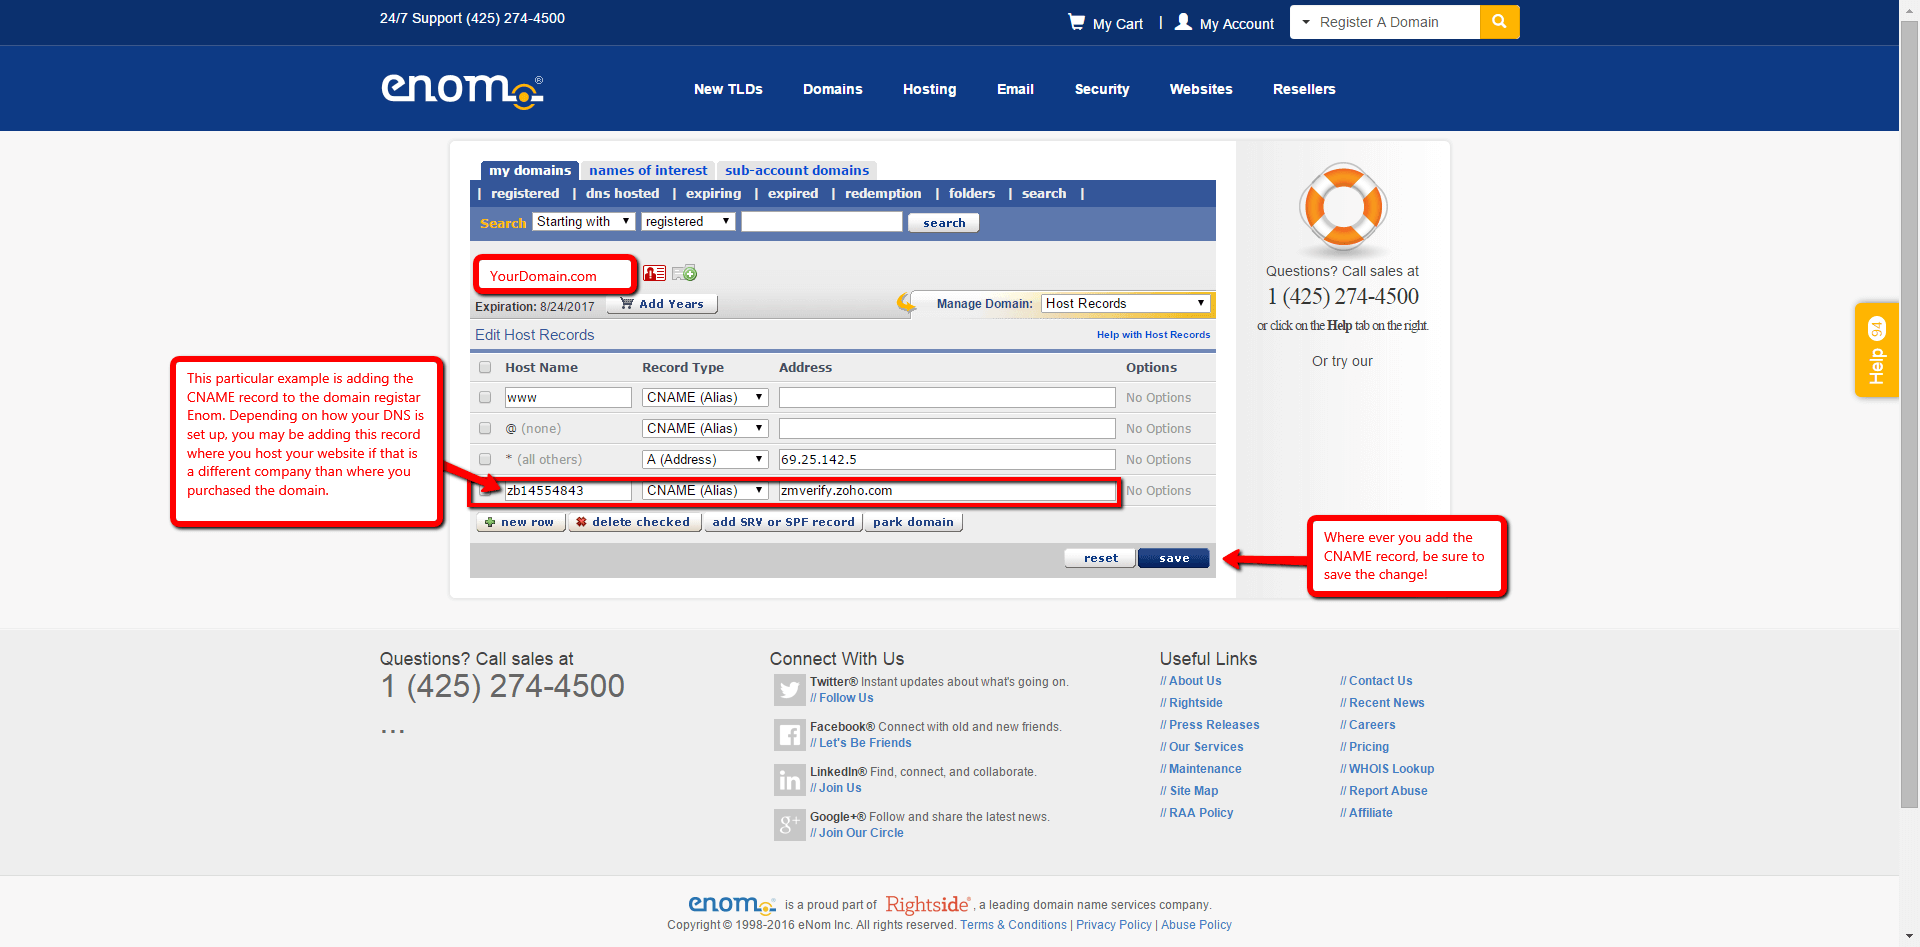
Step 6 Of 13: Add The CNAME Record
First thing to do is open up a new tab or window and go to either your registar or hosting provider if they are different. In my example, I’m adding the CNAME record directly to the registrar. If you don’t have a website and only a domain name or if your hosting and registar are the same, having the record added at the registar level is the best way in my professional option.
If your DNS is pointing to another hosting company, then you will need to log into their hosting control panel to add this record.
Make sure the record type is CNAME and enter the values from the Zoho Mail page. Be sure to save the new record.
Don’t close down the tab or window because we will need to go back later on.
SPECIAL OFFER: Let me set up your Zoho email for just $7! Click here to learn more.
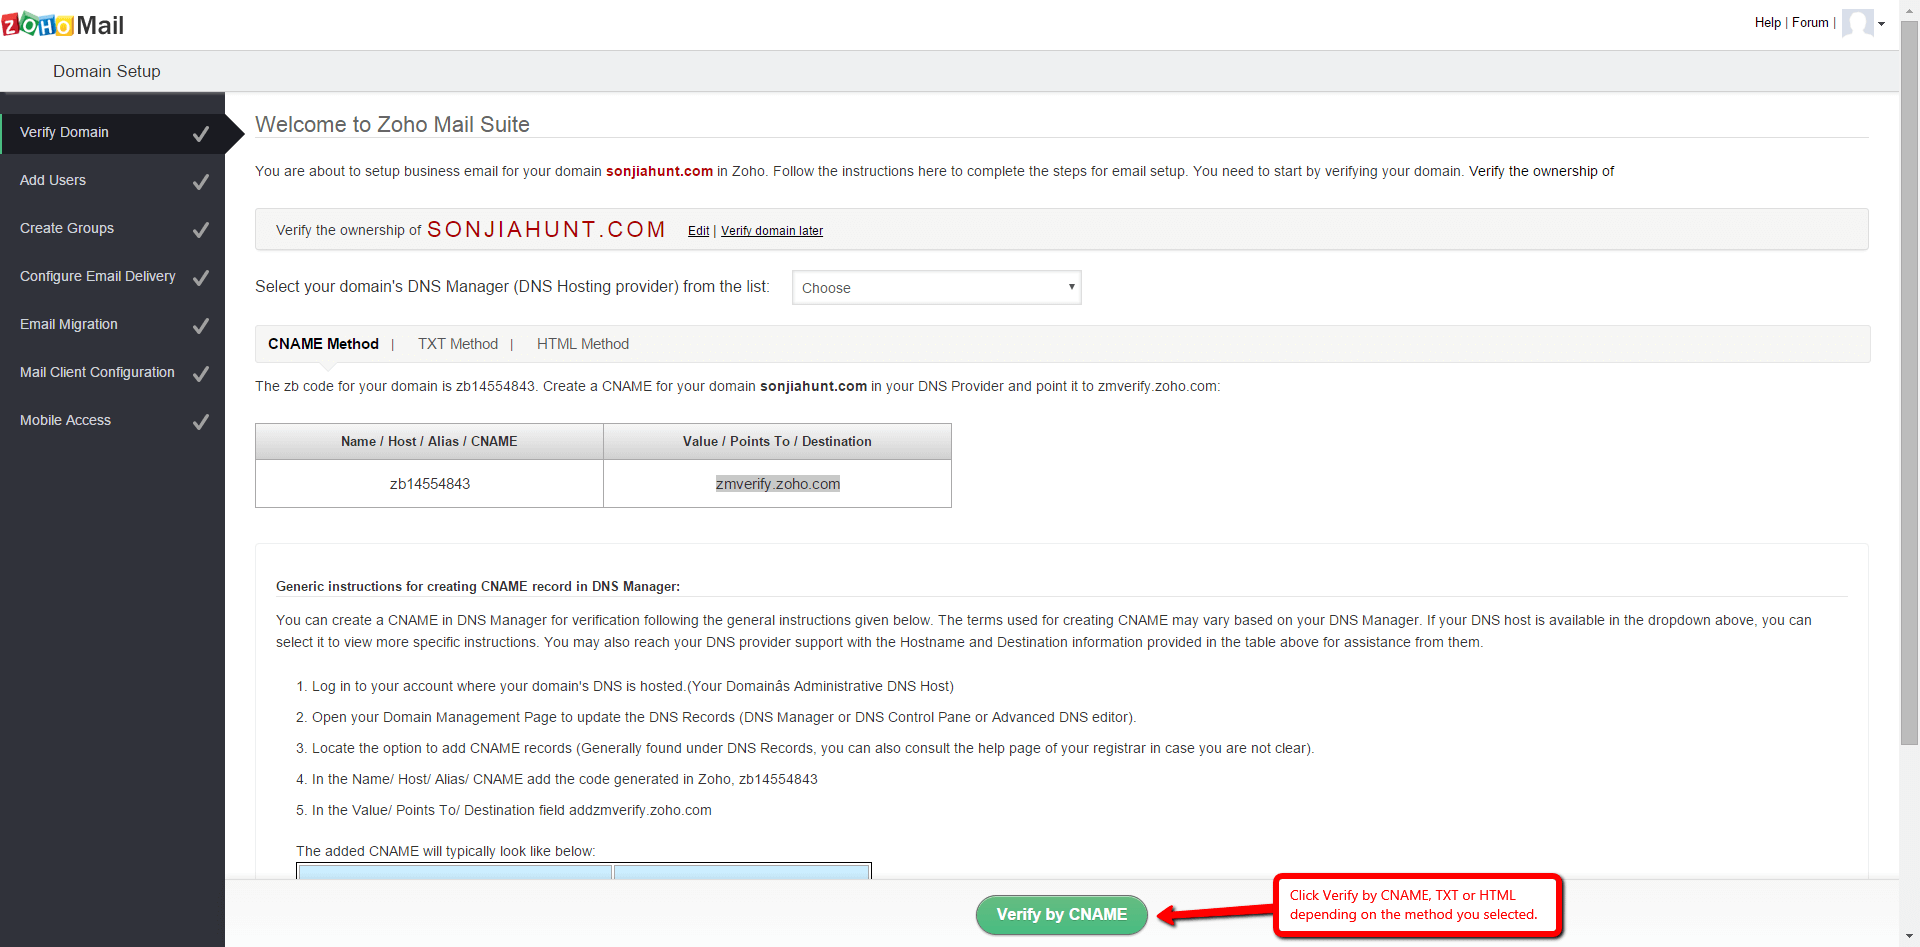
Step 7 Of 13: Verify The Domain
Go back to the Zoho Mail page and click the Verify by CNAME button at the bottom. If you decided to try another method, then the button will ask you to verify that method.
Step 8 Of 13: Create The Account in Zoho
Congratulations your domain should be verified now. If you don’t get a confirmation that the domain was verified, you may have to wait a little bit for the DNS to update. Usually its pretty quick.
Now as a last part of this step, you’ll need to click the Create Account button to continue.

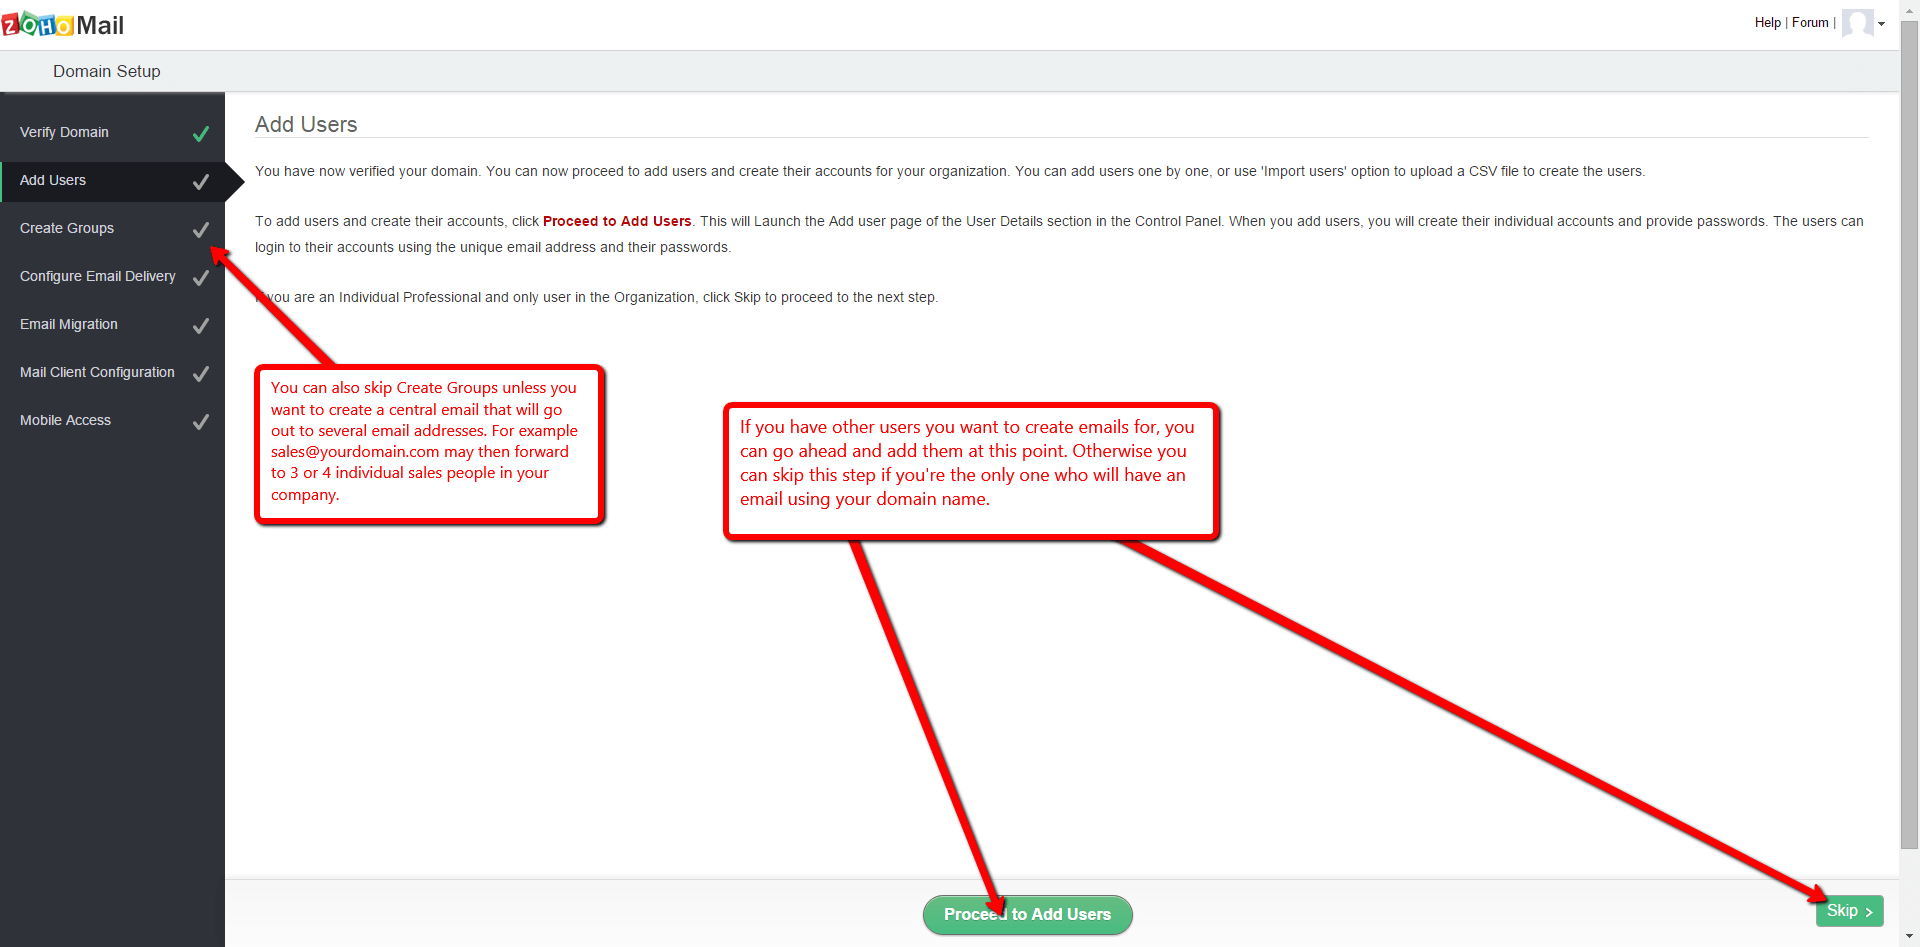
Step 9 Of 13: Add Users
This is an optional step. If you are the only one using an email address for your domain, you can skip this step. Otherwise, click on Proceed to Add Users button to start that process. I will not be covering how to add users in this tutorial.
Likewise, you can skip the next step which is to add Groups. Groups allow you to create a central email address where more than one person gets copied. I won’t be covering this part in this tutorial.
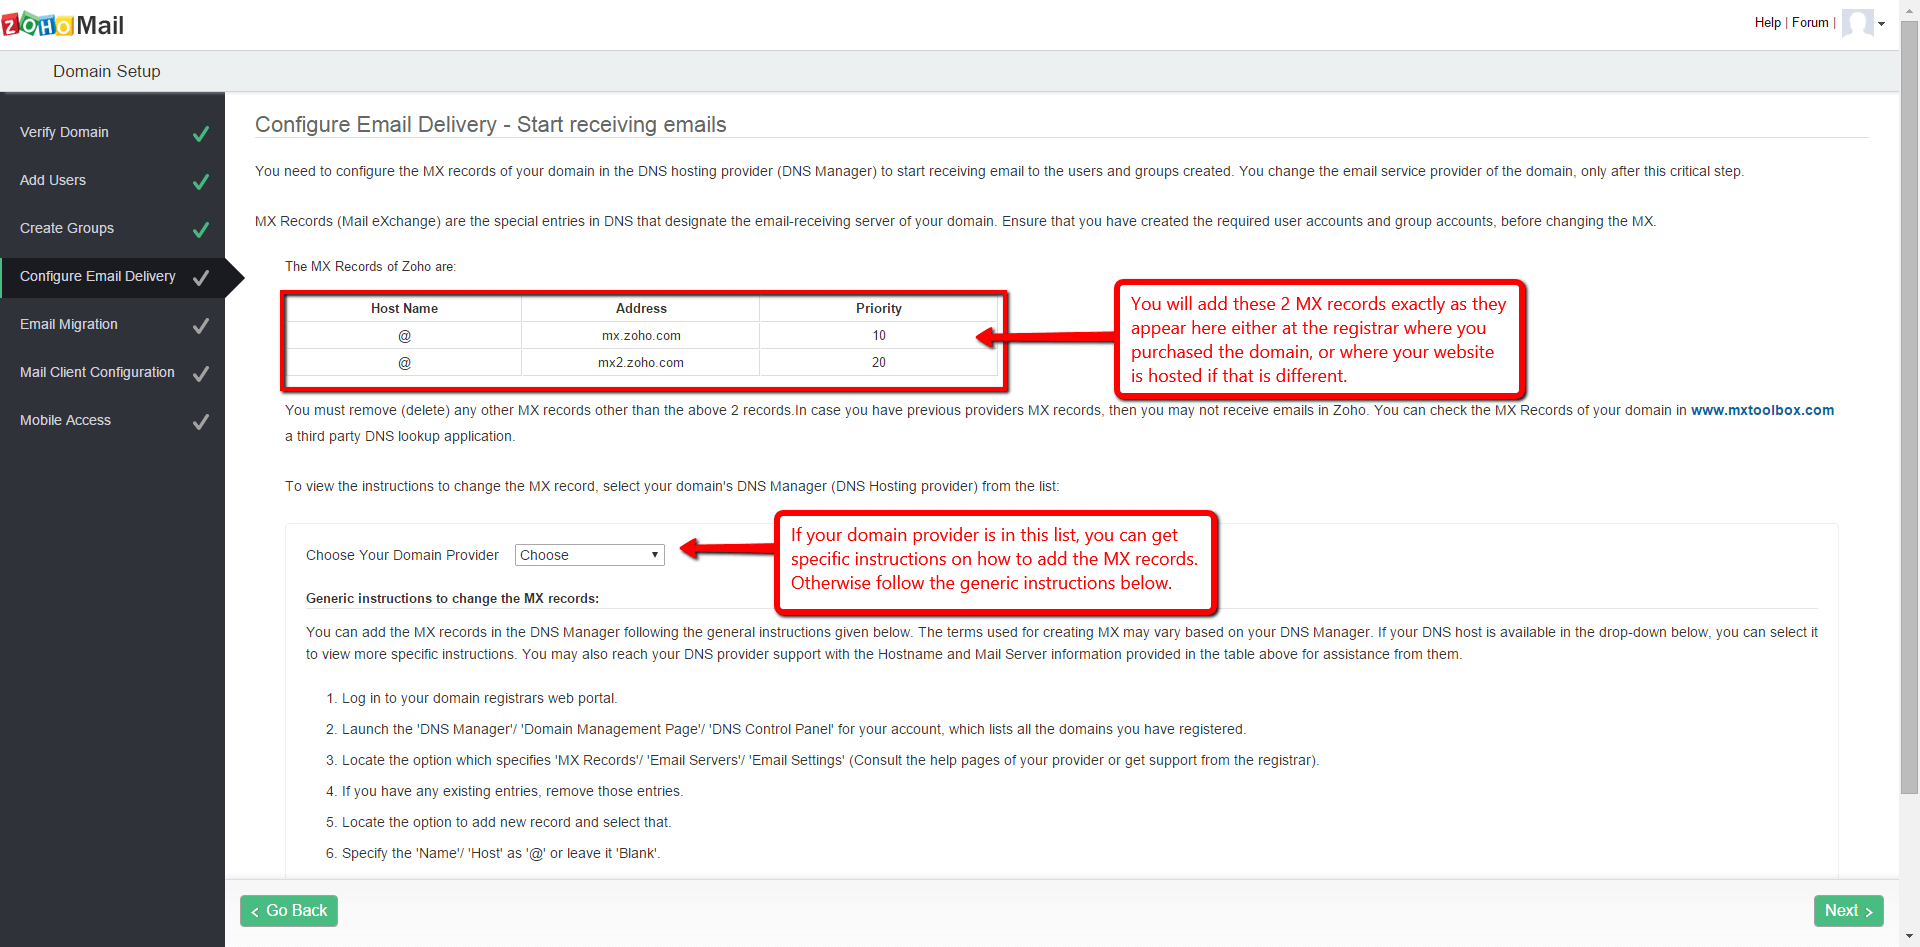
Step 10 Of 13: Get The MX Records
You will now see a page that has 2 MX records. You will also see a Domain Provider dropdown with specific instructions for different hosting companies. If your hosting company is on the list, select it to see how to add these records.
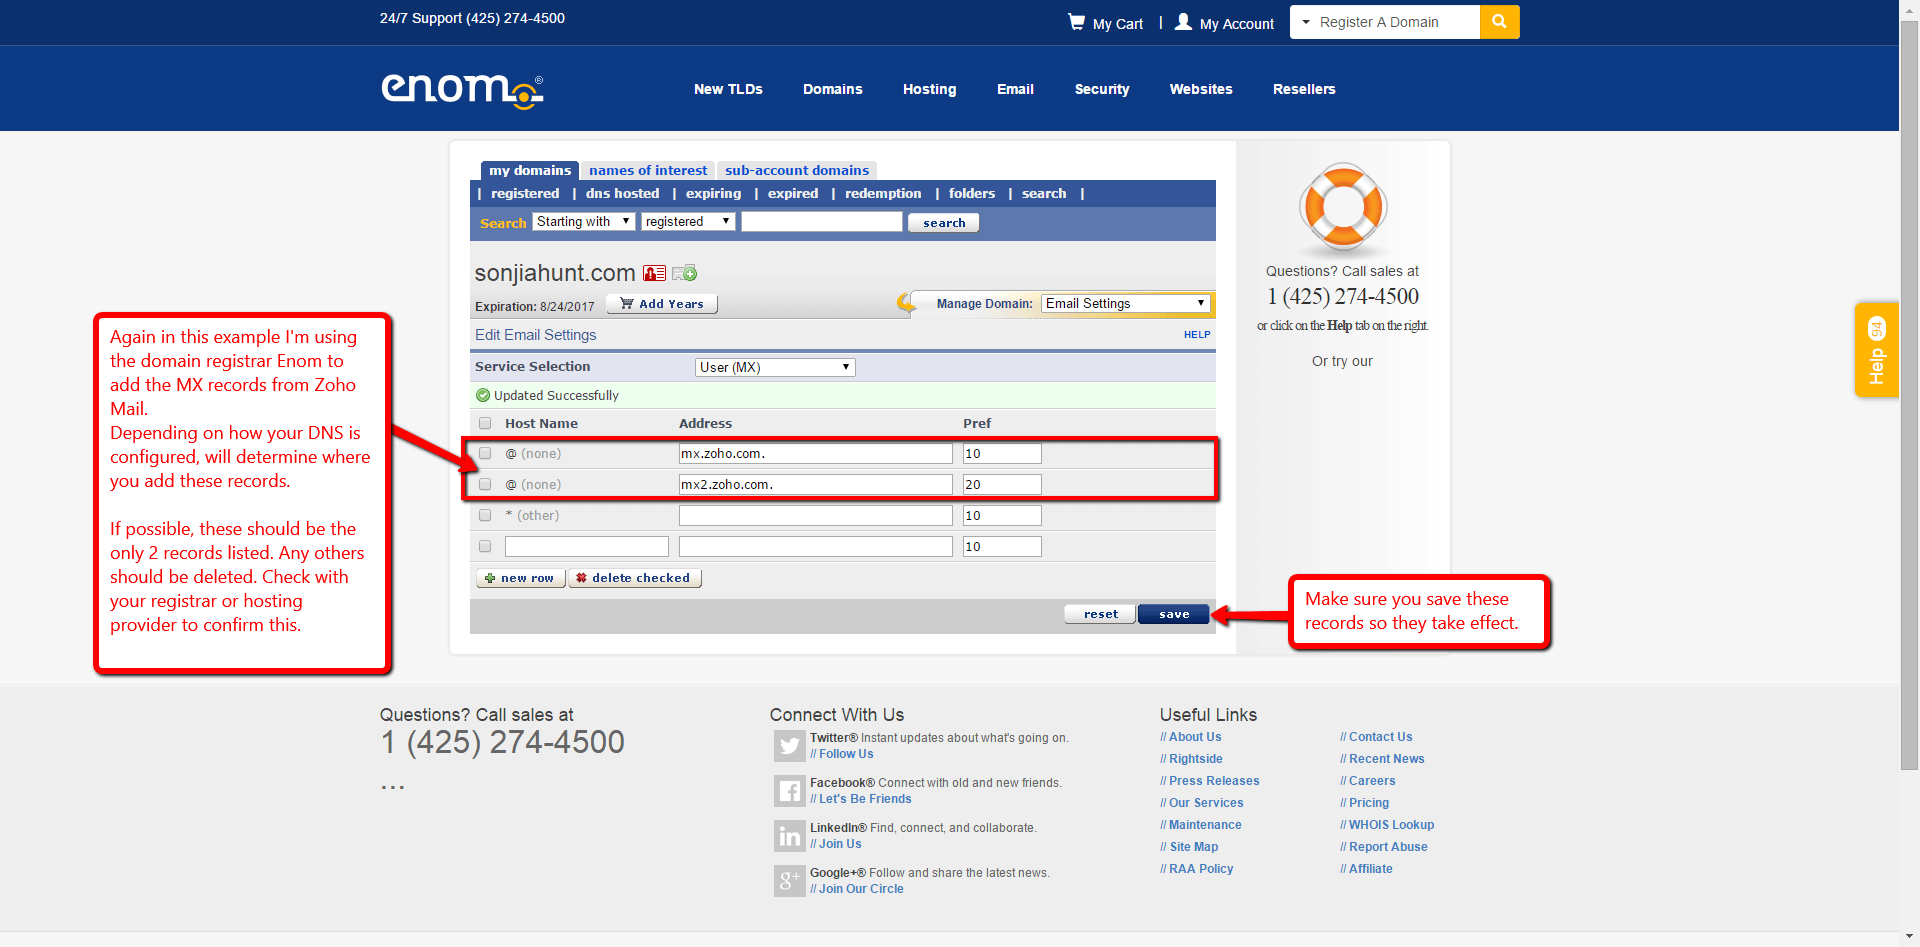
Step 11 Of 13: Add The MX Records
In this example I’m going back to the registrar to add these 2 MX records in. You would follow the instructions given by Zoho Mail and go back to your provider and find the area to add the records.
Add in 2 MX records as they show on the Zoho Mail page and save it.
If you find any other records already in place, you should contact your registrar or hosting provider and confirm they can be deleted.
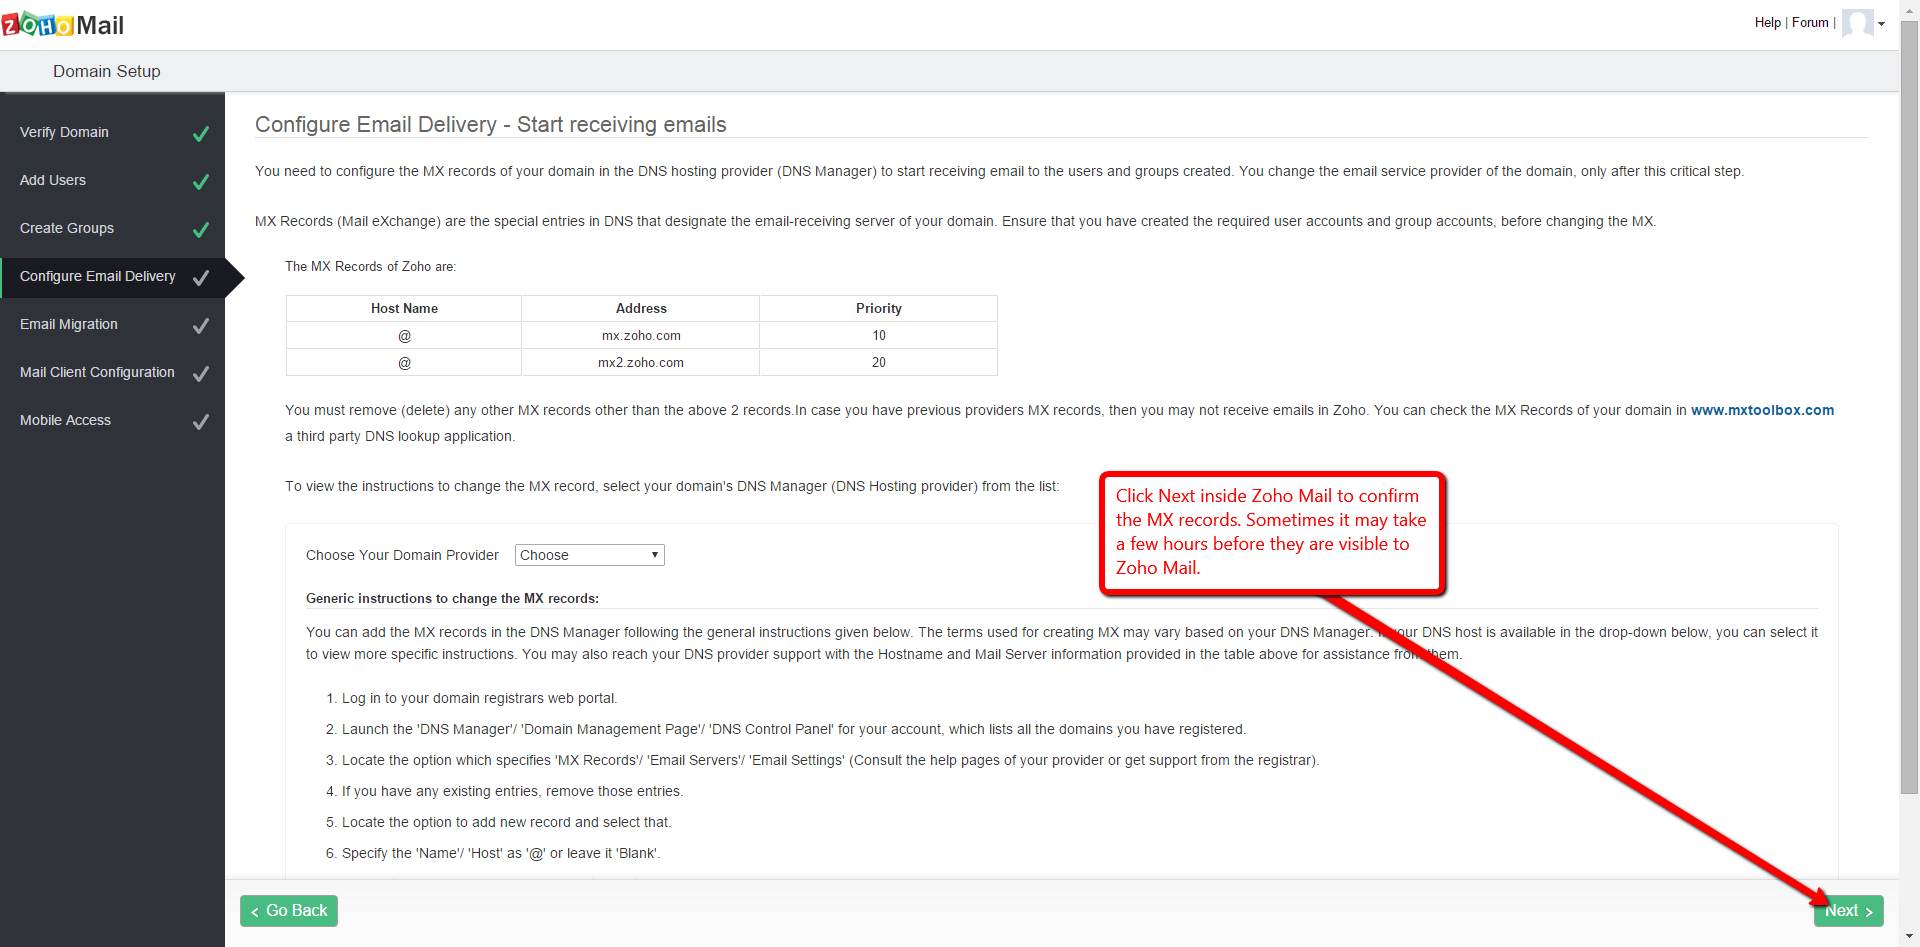
Step 12 Of 13: Confirm The MX Records
Go back to the Zoho Mail page and click the Next button. This will cause Zoho Mail to confirm the MX records are right. It may take a few hours before Zoho Mail sees the updated records.
Step 13 Of 13: Test The MX Records
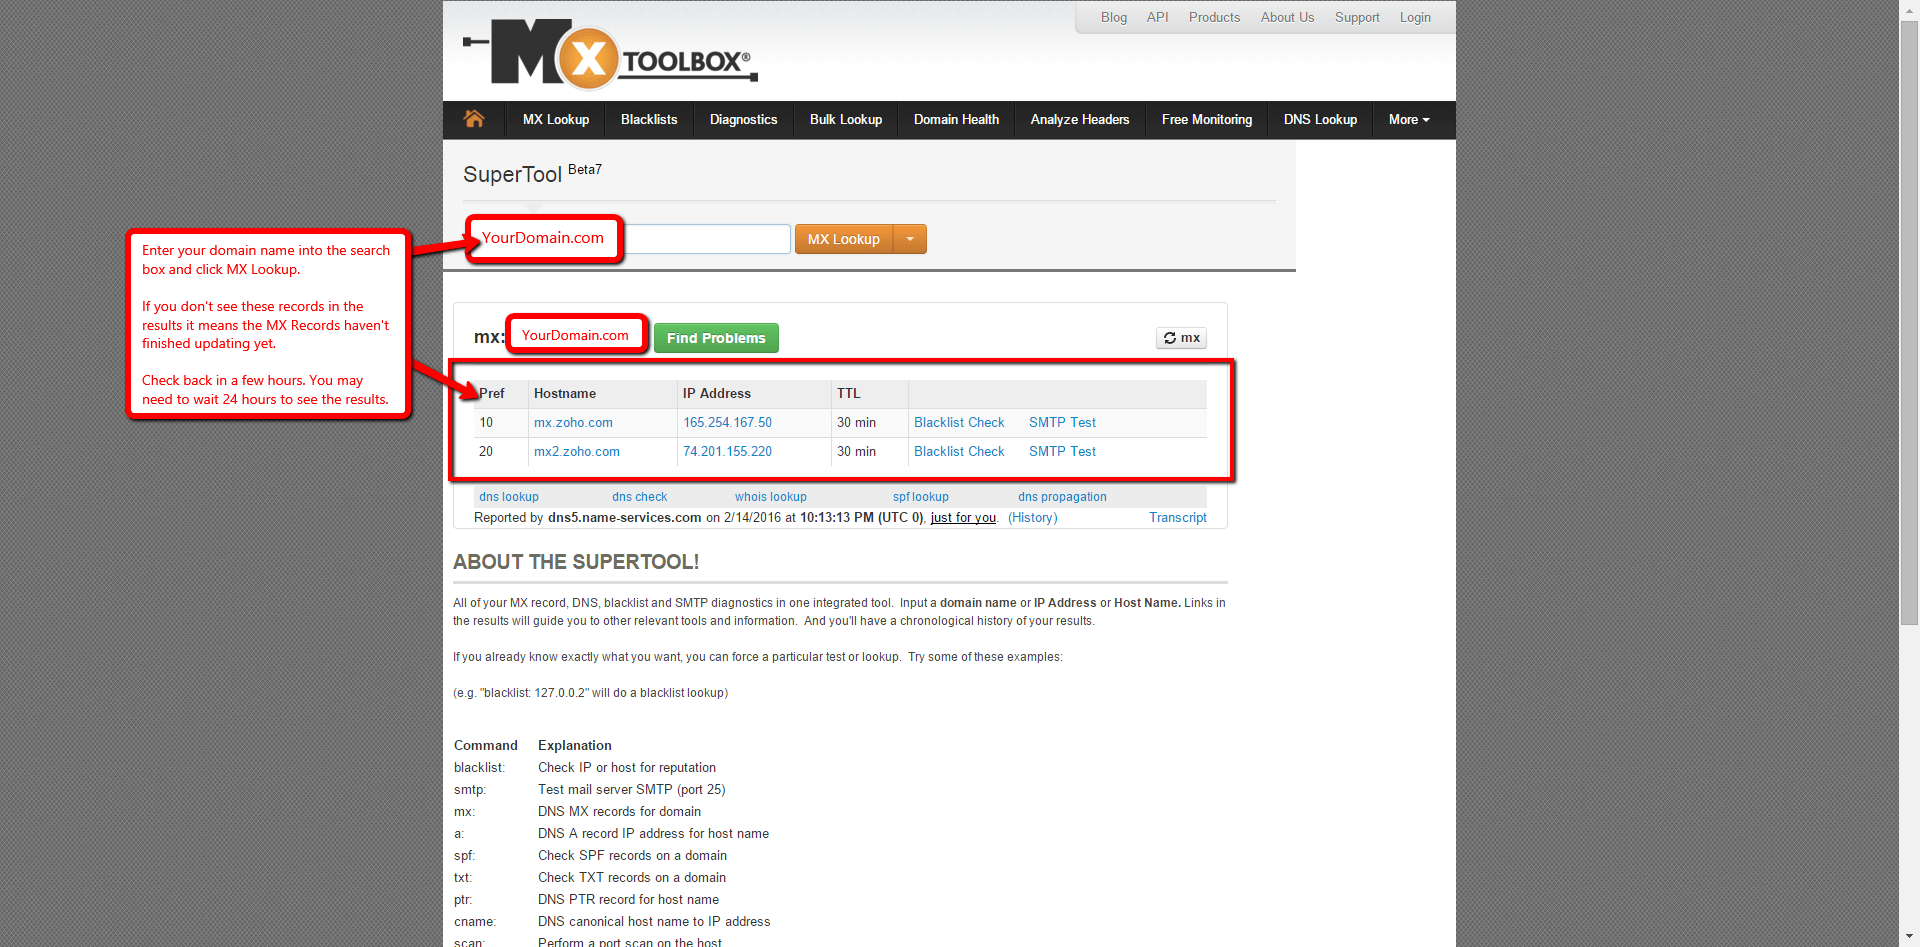
In this final step we’re going to visit a site called MX Toolbox. If your MX records have updated, you should see them here.
Enter your domain name into the MX Lookup field and click the MX Lookup button to begin. Once its done loading, you should see that the MX records look the same as what Zoho Mail gave you.
If they don’t match yet, give it a few hours and try again. You may have to wait up to 24 hours for them to take effect but I’ve personally never had to wait that long.
Once the MX records have been confirmed, you’re technically done. There are other things such as email migration, Mail Client set up (using Outlook or something similar), and Mobile Access but I’m not going to cover those here.
Once you skip through or configure the other sections, you’ll get a link to actually go in and access your new email account! Congratulations you are done!
What To Do Next
I’d recommend sending yourself an email from your personal email address. You can visit the Zoho Mail login page at https://www.zoho.com/mail/login.html and use the primary email and password you created earlier. Also send a test response back to your personal email to confirm everything is sending correctly.
While checking for your test email, you should also find an email from Zoho asking you to confirm your personal email address. You will need to click on that link and verify your email to give you the secondary access. I didn’t include this in the steps above because you don’t need to verify the email to finish the business email set up.
If you’d like make this process even easier, let me set everything up for you with my Done For You Zoho Mail Service.